 Ornate Brewing Co.
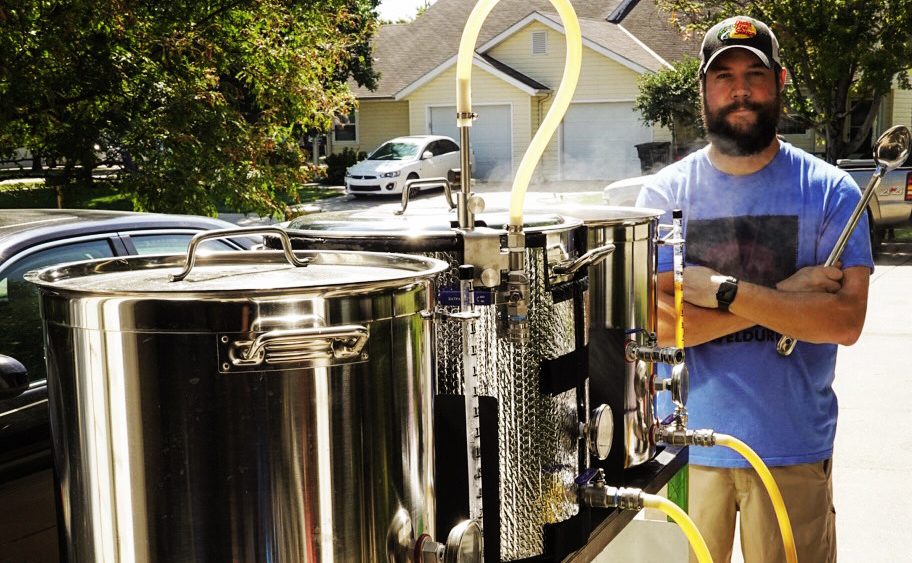
My DIY Glycol Chiller

For years now, I’ve been lusting over the commercial glycol chillers available through different companies such as SS Brewtech and Penguin, but could just never justify the huge amount of money they cost. As nice as glycol would have been, ice water was working just fine, although it was a pain in the ass! While cold crashing beer in the heat of the summer, it wasn’t uncommon for me to burn 100lbs of ice in a day trying to maintain temps. Things were working and I was making good beer, but buying ice and dumping waste water needed to go and it needed to go away fast!
Enter my DIY glycol chiller!

Not only has the ice water solution finally gone away, but temp control is truly a set and forget affair. No more draining water out of the cooler twice daily! No more buying huge amounts of ice! No more spilling water all over the garage floor! Even though glycol isn’t going to help me make better beer, it definitely makes things much more convenient and takes away 95% of the temp control baby sitting I had to do.
Building my own DIY glycol chiller was easy as well as inexpensive, but the amount of information on the internet about how to build one is pretty lacking. I found a few build logs that other people had done, but I needed more info! After months of searching for more build logs, I finally decided to just jump in head first and see what came out the other end.
My way of building the chiller may not be the best way to do things, but it’s worked for me and other than a few small details, I don’t think I would do anything different.
First things first was finding a suitable window AC unit. It needed to be sufficiently powerful, but even more important was that it needed to be an analog unit. While digital units can be used, they’re MUCH more labor intensive and expensive to make work.

After removing the covers to reveal the guts of the AC unit, the temperature probe attached to the radiator on the front needed to be unhooked so that the other parts of the unit can be moved around more easily.


Next, we need to disconnect the thermostat and trick it into thinking that it always needs to run. Plugging everything into an inkbird temp controller will keep it from actually running non-stop.
In order to do this, we need to disconnect the 2 red wires from the side of the control board and wire them together using some electrical tape to secure the connection.


Next comes the scariest part of the entire build! We need to slowly bend the copper tubing so that the cooling fins will fit into our cooler. The trick to this part is to go extremely slowly bending small sections at a time. Keep your eyes open for any kinks that might be starting in the tubing and prevent them the best you can. Kinks in the tubing will greatly reduce efficiency and any cracks in the tube will render the AC unit useless. It also helps to cut a small gateway for the chiller tubing to set into so the lid can close fully.
Go SLOWLY and CAREFULLY!


Now that we have the AC unit and cooler prepped, it’s time to build something to house the whole thing and keep dust/dirt/crap out of everything as much as possible. It doesn’t hurt that it classes things up a bit! As far as the housing goes, I opted for a plywood box with casters and handles to make it a bit easier to move things around. Complete with vent cutouts and a good black staining, it really made things look pretty nice!


With the plywood housing fully put together, I decided it was probably a good idea to glue in some screens over the vents to help keep more of the garage crud out of the system. I then refit the entire cooler and AC unit back into the housing.


Because the plywood box has a fairly tight fitting lid on it, I needed a way for the glycol lines to exit the housing and run to the fermenters. Using a hole saw and then a jig saw fixed this problem fairly quickly.


To help prevent any splashing from making its way out of the cooler, I spray foamed the spot at the top of the cooler I had cut for the copper tubing entrance. It also helps hold things where they’re supposed to be just a bit better so that there’s less risk of damaging the copper tubing.


Now that the bulk of everything has been constructed and put together, it was time to find a solution for running the actual glycol lines to the unitank and future upgrades that I have planned.
First, I cut four sets of three holes in the top of the cooler lid. One hole for the power cord the glycol pump, and one hole each for the glycol and glycol return lines. Even though I only have one piece of equipment right now that can utilize the glycol, I went ahead and cut the extra spots for easy equipment additions in the future.
For the actual glycol lines, I taped two liquid lines together so that I could insulate them together more easily. For the insulation, I just used black foam pipe insulation from Menards. I reinforced it with a heavy layer of black duct tape to keep everything together and then installed the female end of the liquid quick disconnect. Unfortunately, I only have a few pictures of this process.
On the fermenter, I also ran two short lengths of tubing connected to the male end of the liquid quick disconnect. This way, when moving the fermenter towards the brewery or towards the cleaning area, it’s much easier to disconnect the glycol system.


At this point, it was time to get the temperature controller set up!
For controlling the temperature and turning on/off the AC unit, I decided to go with an Inkbird ITC-308. I have used this particular unit in the past and getting things setup and running couldn’t be any easier.
First I had to get another small hole cut in the side of the plywood housing so I could run the inkbird wires inside towards the AC unit and power cables. I was then able to plug the AC unit into the Inkbird and also get the temperature probe installed deep down inside the glycol reservoir. In theory, the temp probe will tell the controller when to turn on and off the AC unit based off the temperature of the glycol inside the reservoir.
I also installed a small aquarium pump inside the reservoir that will turn on and off with the AC unit to keep the glycol solution moving. When the AC is running, it will be beneficial to keep the glycol moving against the fins for more thorough and even chilling of the solution.


WOOHOOOOO!!!!
We finally have everything built and plugged in! It’s finally time to add the glycol/water solution and get things rolling!
Glycol is a funny thing. The higher the concentration of glycol in the solution, the lower the freezing point and the lower you can chill the liquid. BUT, the higher the concentration of glycol, the lower the heat capacity. Since we don’t have to go super cold to maintain fermentation temps, we can use the super high heat capacity of water and create a happy medium of a mix of glycol and water. This way, we can get the best of both worlds. The glycol will lower the freezing point of the solution and the water will keep the heat capacity sufficiently high so we can pull heat out of the fermenter.
For my system, I shot for a 1:2 ratio of glycol to water. This should give me the low freezing point I want without killing my chilling ability. I ended up using 2.5 gallons of food grade propylene glycol to 5 gallons of distilled water. This should give me a freezing point of about 4°F


Now that everything has been fully put together and the glycol solution added to the reservoir, it was finally time to plug things in, set temps on the controller and let it do it’s thing!!


All in all, the whole project wound up costing me about $250 to get everything up and running. While not a small amount of money, it was still MUCH less that the $800-1000 for an entry level pre-made glycol chiller. It definitely took me more time to go this route, but I learned a TON and I have the pride in knowing that I built everything myself.


how accurate are the temps when reading from the fermenter? Are you worried about temparature gradient inside of the fermenter?
LikeLiked by 1 person
I’m not really worried about any gradients at all. I’m sure it happens to small extent, but there’s no way that I can really control it at all. The stainless coil that runs down through the center of the fermenter is fairly deep reaching and I just let it do it’s thing. If I concerned myself with temp gradients inside the fermenter, I think I would slowly drive myself crazy!
Great question!
LikeLike
Hi, Great article, thanks for sharing. What size cooler did you use, and do you remember where you purchased it?
Sean
LikeLiked by 1 person
Thanks, Sean!
The cooler I used is an Igloo 54qt roller cooler. I can’t remember exactly where I got it from, but they’re pretty easy to find at a lot of different places. I’ve seen them plenty of times before in the past at Walmart as well as Target. The only modification I did to it was to remove the rolling handle because it only got in the way and doesn’t have any functional benefit for the glycol chiller.
LikeLike
Thank you so much for getting back to me, I really appreciate!!
LikeLiked by 1 person
I own a small craft distillery and am looking for something like this to cool my reservoir tank I use to cool the stills. Thanks!!!
LikeLiked by 1 person
No problem at all! It was a seriously fun project and the amount of use it has seen made it all worth it for sure! Where are you located at? I’d love to help support your operations if I can!
LikeLike
I’m highly impressed and inspired by your build. I slowly started my own build this week.
Where did you purchase your tubing quick disconnects?
LikeLiked by 1 person
Thank you very much, John! I definitely put a lot of work into, so I’m happy to hear that you’re getting some good use out of it!
For the quick disconnects, I went through US Plastic and ordered off of there. Don’t do what I did at first and order parts that were different sizes and incompatible because of it. I’m not sure what size tubing you’re using, but I went with 3/8″ ID tubing, so that’s the sized quick disconnects that I used.
Here’s links to the parts I needed:
3/8″ Hose Barb Body https://www.usplastic.com/catalog/item.aspx?itemid=118169&catid=743
3/8″ Hose Barb Inset https://www.usplastic.com/catalog/item.aspx?itemid=118171&catid=743
LikeLike
Thanks for sharing your build details. Had a question about the aquarium pump setup you have recirculating the glycol/water in the cooler. How is it wired to turn on with the a/c unit? Is it simply daisy chained into the inkbird cooling outlet? Also just curious what are the dimensions of your whole assembly? Thanks for the info.
LikeLiked by 1 person
Hey Grant! The aquarium pump was easy. I just daisy-chained it like you mentioned so that the AC unit and aquarium pump both turn on and off at the same time.
As for the overall dimensions, I definitely built it bigger than I needed to. My woodworking skills aren’t exactly the world’s best, so the box ended up having a lot of extra room inside that isn’t really necessary. It wound up being 26″ tall, 29″ deep, and 41″ long.
LikeLike
Hi Matt,
Sean here again, my son and I just picked up our cooler and we are getting closer, and are super excited. I had a question, on how you cut out your vent slots, I was thinking a router? What did you use?
Thanks
LikeLiked by 1 person
A router would probably work the easiest!! I don’t have a router, so I used a hole saw bit on each side of the vents and then just used a jigsaw to connect the holes. If I had a router, that’s definitely the route I would take!
LikeLike
Matt, thanks for the quick response,I really appreciate it.
LikeLiked by 1 person
Matt, one more question, those 3 wires that were attached to the condenser, did you reattach them to to base of the unit for grounding purposes?
Thanks
LikeLiked by 1 person
Sure did. I had to think for a minute to remember which wires you’re talking about, but I believe I did just tie them back into the metal housing.
>
LikeLike
Cool, thanks for the quick reply again, I have a picture I would like to share with you of our current build. What is a good email for you?
Sean
LikeLiked by 1 person
Absolutely! 100%! I just emailed you!
>
LikeLike
Nice work on your build. Was curious on the temp probe. I see inkbird has an aquarium probe and a temp probe do you suspect one is better than the other or will the stainless temp probe survive the glycol bath the same (or differently) then the aquarium coated probe. Any comments would be great.
LikeLiked by 1 person
To be 100% honest, I’m not exactly sure. I went with the regular temp probe, and so far it has been working out great. There’s no corrosion that I can see and it doesn’t seem to have lost any of it’s accuracy. I’ve also used an inkbird on kegerator and have it in a mason jar filled with water to slow down the cycling on/off of the deep freezer and it seems to still be in great shape as well. I don’t have any experience with the aquarium version at all, but surely it would work just as well as the regular versions and maybe even a bit better? Let me know what route you decide to go!
LikeLike
Ok. Thanks Matt. Just an fyi that I just stuck with the itc308 regular temp probe. I did find some reviews that te aquarium probe plastic was breaking down after a couple of years. Only reviews I haven’t verified. Well time to find a cooler and start bending that copper. I noticed you bent yours so the evaporator was standing vertical instead of horizontal.
LikeLiked by 1 person
Yep. I figured that bending it so that it stood vertical would make it easier to keep things low in the glycol and chill a bit better. I have nothing to prove this theory, it just seemed like it would work best that way at the time.
LikeLike
Yes, great work again. Nice carpentry. On your aquarium pump (for recirculation) when you say daisy chain do you mean you just put a splitter on the cooling side of the inkbid?
LikeLiked by 1 person
Thanks! For the aquarium pump, I basically just used a really short surge protector that I plugged into the inkbird. Both the AC unit and aquarium pump are plugged into it so they both turn on and off at the same time.
LikeLike
Great idea Matt. Thanks for the responses. Cheers to many tasty beers.
LikeLiked by 1 person
No problem at all. Good luck with your build!!! Cheers!
LikeLike
Hi Matt- I’ve been looking all over for these kind of plans. Great write up and thanks for your time putting this together! I have a question about fermentation temp control. Does the fermenter temp match the temp of your glycol reservoir, therefore your ink it’d gives an actual reading of the fermenter temp? Or is there a temp differential between your glycol reservoir and the fermenter? Also, at what increment are your fermentation temps controlled (.5 deg, 1 deg, etc). Thanks!
LikeLike
Hey Corey! I’m glad you got some use out of my build write-up!
I actually have 2 temperature controllers. The first one is on the glycol chiller so that I can control accurately what temperature the glycol solution is currently at. Normally, I’ve been keeping it at about 25 degrees +/- 2 degrees. This seems to be the happy spot for my setup so that the AC unit isn’t running constantly trying to cool the solution and it stays cold enough to chill my fermenters easily.
The second temperature controller is attached to the fermenter and allows me to adjust things depending on what stage of fermentation I’m currently at. If I’m still in primary for the beer, I can set it at 68 or whatever temperature I’d like and then I can drop the temp later on to crash cool things down when I’m getting ready to package and keg the beer. I also have it set at a 2 degree differential so that the temp controller isn’t constantly fighting with itself to maintain a steady temp.
Having a dedicated glycol temp controller and then separate temp controllers for my fermenters allows me to adjust everything independently depending on what stage my beer is at and also allows the glycol chiller to maintain a steady 25 degree temperature.
I hope this answers your questions! Cheers!
LikeLike
Great plans Matt. Thanks for sharing. Im dealing with very high energy bills here.
My fermentation room stays at 68 all year. Will be mostly be doing ales . What percentage of the time would you say unit would be running? Sounds like your conditions are similar Thanks
LikeLike
Hi Keith! Currently, my glycol chiller and fermenters are living in the garage which gets really pretty warm this time of year. It really doesn’t seem to have any trouble keeping up with the heat in the garage and seems to be working quite well. When I’m just maintaining fermentation temps, it seems to run maybe 20% of the time. When I’m crashing down to serving temps it’s running probably 75% of the time but only over an hour to an hour and a half until it hits the target temp. And then when I’m maintaining serving temperature, it runs about 40% of the time.
All of this is in a garage that stays around 80 degrees during the summer.
Hopefully that answers your question!
LikeLike
nice job with your build just wanted to know what size pump did you use to pump the glycol through your feed lines?
LikeLike
Hey Marshall! Unfortunately, I’m not quite sure the exact size of the pump for recirculating they glycol. I have an SS Brewtech unitank that the glycol is chilling and it came with a pump to be used for the temperature control. It really doesn’t seem like its a powerful pump at all. Just as long as the vertical height you’re pumping isn’t too great, it shouldn’t need much power at all.
LikeLike
Hi, great job! i have a question for you:
Can i put several pumps to recirculate in several fermentors with a STC 1000 for each fermentor?.
Thanks and greettings from Argentina.
LikeLike
Hi Ariel! I really don’t think adding multiple pumps for different fermenters would pose any issues at all. My setup currently runs pretty infrequently and doesn’t seem to have any issue at all keeping up with things. I definitely wouldn’t overload things by adding too many fermenters, but I would imagine it could handle 3 or 4 fermenters without any issues just as long as you aren’t trying to crash cool them all to serving temperatures at the same time. If you give it a shot, definitely let me know how things work out!
Cheers!
LikeLike
Great article Matt! Does your set up struggle with cold crashing? Any data on getting from room temp to 34F or so? Wondering if a bigger unit (>5000BTU/hr) might be needed for multiple/larger fermentors and cold crashing
LikeLike
I’m really not sure what it would take to crash multiple fermenters at the same time, but unless you get super crazy with it, I don’t think you’d have much problem at all. The AC unit I used is a 5k btu unit and it will cold crash 12-13 gallons down to serving temp in about an hour. The AC unit seems to keep up with demand really pretty well and is usually fully recovered within about 30 minutes after reaching the target temp. It might take a tad longer to crash multiple fermenters at the same time, but I also think it could keep up fairly well.
LikeLike
This is a great design. I just built my own chiller using yours as a template. Now that you’ve been running it for the better part of a year, have you run into any durability issues? how are the AC, temperature probe, duct tape, and aquarium pump holing up?
LikeLike
So far, so good! It has been up and running for right at a year now and doesn’t seem to have slowed down one bit at all. Seems to do everything I need it to without too much complaint either. Other than getting a bit dusty from living in the garage, it still seems to be at 100%!
LikeLike
A word on AC units for other folks who are using this design – a digital unit is no more difficult than an analog unit to set up. I bypassed the control unit all together and hardwired it. As long as you keep the capacitor to spin up the compressor, you don’t need the fan or temperature controls since you’re using the ink bird to control the temperature.
LikeLike
This is very good to see as well. I’m not very familiar with electronics and what different things are designed to do, so I decided to go analog just to keep things a bit easier for my brain. It’s definitely good to see that there are other options for making things work! Seems that digital AC units are becoming more and more the norm, so it makes it a lot easier to find a suitable unit.
LikeLike
Hey Matt,
Great write-up. Just starting on my build. I’m a bit concerned about having the self-contained DIY unit getting too hot in my garage here in So. Cal in the summer. I know that the duty cycle on this is prob much lower that when used as a standard window air conditioner, but does it add a lot of heat to your garage without outdoor venting? I have not purchased an A/C unit yet, and was thinking about getting a portable unit is that I could vent it through the duct that typically comes with these units. I’ve found used analog window units for $35 on Craig’s List, and portable units from $100.
LikeLike
I really don’t think I would worry about it too much at all. I have mine located in the garage as well where it definitely gets hot in the summer and there’s practically no additional heat at all. I’ve had mine running for a full year now and I’d say it runs less than 10% of the time and any heat it produces is so small it’s practically non-existent. In any case, good luck with your build!! Cheers!
LikeLike
This was just the article I was looking for, thank you! I have a spare dorm fridge, do you think it could be used instead of the AC unit? Separate the cooling coils and submerge them in the glycol?
LikeLike
Hey Karl! I’m glad you enjoyed my article! I’m really not sure if a dorm fridge would work or not. I guess it would all depend on how possible it is to separate everything from the fridge so it could be incorporated into the system. I’d hate to give you bad advice so I’ll definitely defer to the experts on the subject. If you get it working, definitely let me know!
LikeLike
Thanks for the quick reply. Do you think it would have enough BTUs? I may tear it apart as it wouldn’t be a great loss if it doesn’t work.
LikeLike
I guess it really just depends on what the mini fridge is rated for. The window AC unit I used is 5k and I really don’t think I would go much below that at all. It doesn’t seem to have any problem keeping up with things, but I would much rather overshoot on things to keep the system stress low.
LikeLike
Matt,
Thanks for the step by steps on this. I’m almost done with my build! One question I have is regarding the cooling fins. There is a black foam on the bottom and edge that is a PITA to peel off. Did you leave it in? Will it be an issue with the glycol if I leave it?
Thanks again!
Dan
LikeLike
Hey Dan! I’m glad everything is coming together for you on your glycol build! For the black foam stuff, I don’t think my ac unit had any on the actual cooling fins, so my advice might not be the best. I don’t think you would really hurt anything by leaving it on, but I would still try to peel as much off as possible. It might be a bit overkill removing it, but it might help keep things a bit more sanitary in the long run. Good luck with everything! -Matt
LikeLike
As usual for me, nothing ever goes easy. Finally got it running and it won’t chill and can’t figure out why. Temp of glycol and water won’t go below 82.5. Any thoughts besides ac unit is no good. I didn’t check it when I bought it. Figured it was good. Before wiring I set temp to lowest and mode to high cool. Should I swap it to high fan? Not sure if that matters. Can send photos if needed as I took pictures the whole way thru. Appreciate any help you can provide.
LikeLike
Matt, disregard my prior post! I messed with the knobs and settings and it kicked on for me. I’m thinking it was stuck between high cold and low cold and couldn’t make up its mind so did nothing! Chilling great now! Thanks for the great write up!
LikeLike
That’s great to hear that it started working for you! I’m afraid I wouldn’t have had much of an answer for you if it continued to be stubborn. Cheers!
LikeLike
Did you plug your pump into the heating side of the inkbird? How did you make it pump when the ac unit kicked on? I’m sorry if this is a simple answer… I can’t make my brain understand it for some reason. Thanks in advance.
LikeLike
Nevermind my last question. My actual question is how are you making the two inkbirds work together?
LikeLike
Hey Peyton! Easy question. The two inkbirds aren’t actually working together. They work independently of each other. One inkbird has the temp probe going to the fermentor to determine when to turn on/off the pump and the second inkbird has the temp probe inside the cooler of glycol solution telling the A/C unit when to turn on and off. The A/C unit’s inkbird actually has a small power strip connected to it, so when the glycol solution rises to above the specified temperature, it actually powers the A/C unit as well as a small pump inside the cooler to keep the glycol recirculating over the cooling fins.
LikeLike
Hi Matt,
Great build. Have a few questions about the glycol. You used food grade glycol (I’m assuming the glycol didn’t have rust inhibitors). Have you noticed any corrosion issues? Do you need to change out the glycol mixture, and if so, about how often?
Thanks,
Mike
LikeLiked by 1 person
Hey Mike! I haven’t noticed any rust issues at all. It really hasn’t been a problem for me yet. As far as changing out the glycol, I haven’t replaced it yet, but it might be about time to think about doing so. Things still seem to work just fine, but the water/glycol solution is getting a bit gross looking. I don’t think it has affected performance in any way, but it’s been going for quite awhile now and a refresher would probably be a good thing. I have beer fermenting right now, but once this current batch is packaged up, I’ll probably replace the glycol solution to keep things fresh.
LikeLike
I have a very similar unit but the wire colors are a bit different. There is a red and a black wire on the thermostat controller. I am thinking that they can both be spliced. Any thoughts on this? BTW great build. It gave me the kick in the pants to start mine. I have more money in glycol than equipment,. I found a 2 y.o. air conditioner for 15 bucks on Facebook. Thanks again
LikeLike
Hey Ed! Thanks for the kind comment! I’m glad you were able to get some use out of the build thread and get a glycol unit of your own up and running. For the red and black wires though, I’m afraid I really don’t have an answer for you. I don’t have a great grasp on that subject and I’d hate to give you bad advice. Maybe someone else would have a better answer for you? Cheers!
LikeLike
Hey Matt, does the entire cooling fin piece need to be submerged by the liquid solution?
LikeLike
Hey Gary! If at all possible, I’ve found that it’s best to try to keep the full cooling fin submerged. It will get better efficiency and less chance of freezing up the water in the solution and humidity in the air.
LikeLike